Dynamic Angular Microfrontends
Using manifests and dynamic routing


by
Stefan Haas
Introduction
The key idea behind microfrontends is to lazy load code at runtime, such that the Angular compiler does not need to know about the lazy loaded feature modules at runtime. This is especially useful, when multiple teams are working on a project and independent deployment is necessary for productivity.await import('http://localhost:4200').then(m => m.ROUTES)Your First Angular Microfrontend
In the next part, I will assume that you already know how Module Federation can be used to statically lazy load microfrontends with hard-coded URLs. Obviously, having hard-coded URLs is not good, because we might want to implement some logic that decides which microfrontends should be loaded depending on user permissions, or just the deployment stage (dev, staging, prod).
Guide
I have created a monorepository containing two remotes (remote1, remote2) and one shell. Both remote1 and remote2 expose a routing configuration in the webpack config such that the routing configuration can be lazy loaded by the shell. The shell only contains a router-outlet that is used to display the remotes and also contains a navbar that has one router-link for each remote. This is basically all the necessary code for presentation. The tricky part is the dynamic routing which is based on a manifest file. The manifest file should at least implement the RemoteConfig from the @angular-architects/module-federation package and can extend more custom properties that are needed for your application. My manifest for example extends it like the following:import { Manifest, RemoteConfig } from "@angular-architects/module-federation";
export type CustomRemoteConfig = RemoteConfig & {
exposedModule: string;
route: string;
routeConfigName: string;
};
export type CustomManifest = Manifest<CustomRemoteConfig>;
manifest.ts
{
    "remote1": {
        "remoteEntry": "http://localhost:4201/remoteEntry.js",
        "exposedModule": "./Routes",
        "route": "one",
        "routeConfigName": "routes"
    },
    "remote2": {
        "remoteEntry": "http://localhost:4202/remoteEntry.js",
        "exposedModule": "./Routes",
        "route": "two",
        "routeConfigName": "routes"
    }
}
mf.manifest.json
import { loadManifest } from '@angular-architects/module-federation';

loadManifest('/assets/mf.manifest.json')
  .catch((err) => console.error(err))
  .then(() => import('./bootstrap'))
  .catch((err) => console.error(err));
main.ts
bootstrapApplication(AppComponent, {
  providers: [
    importProvidersFrom(HttpClientModule),
    provideRouter([]),
    {
      provide: ROUTES,
      useFactory: () => createRoutes(),
      multi: true,
    },
  ],
}).catch((err) => console.error(err));
bootstrap.ts
import {
  getManifest,
  loadRemoteModule,
} from '@angular-architects/module-federation';
import { Routes } from '@angular/router';
import { CustomManifest } from './custom-manifest';

export function createRoutes(): Routes {
  return Object.entries(getManifest<CustomManifest>()).map(([key, value]) => ({
    path: value.route,
    loadChildren: () =>
      loadRemoteModule({
        type: 'manifest',
        remoteName: key,
        exposedModule: value.exposedModule,
      }).then((m) => m[value.routeConfigName]),
  }));
}
routes-factory.ts
<div class="navbar">
  <ng-container *ngFor="let m of manifest | keyvalue">
    <a [routerLink]="[m.value.route]"></a>
  </ng-container>
</div>
navbar.component.html
Result
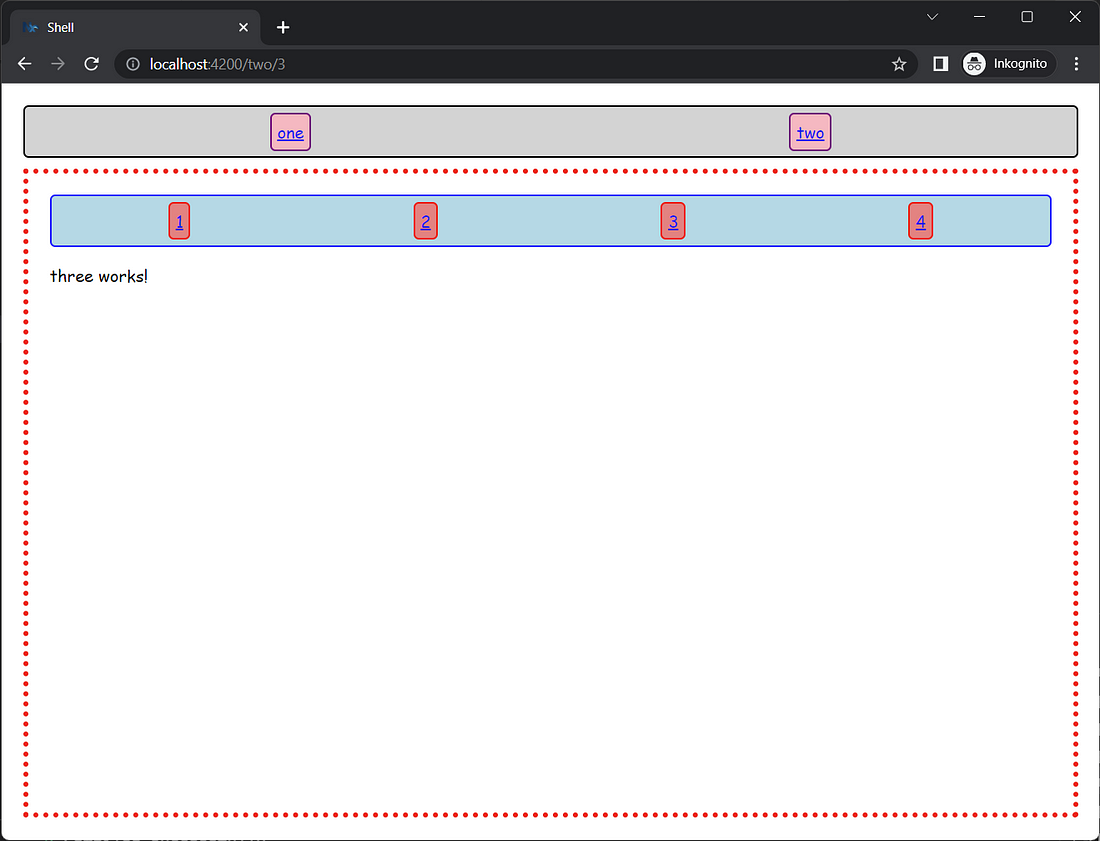
shell application
Prospect
This dynamic approach can be used for multiple interesting cases. The code is static, but the logic is contained in the manifest file and therefore a CI/CD pipeline could exchange the file depending on the stage. Otherwise, the manifest could be loaded entirely from a backend depending on the permissions of a logged in user. Or it could be used for A/B testing.- Deployment Stages
- A/B Testing
- Dashboards
- Conditional Rendering based on permissions
- Plugin Architecture
In conclusion, this dynamic loading enables companies to have more control and scalability potentials for their microfrontend architectures.